LEGO Pirates of the Caribbean – Isla Cruces 100% Guide

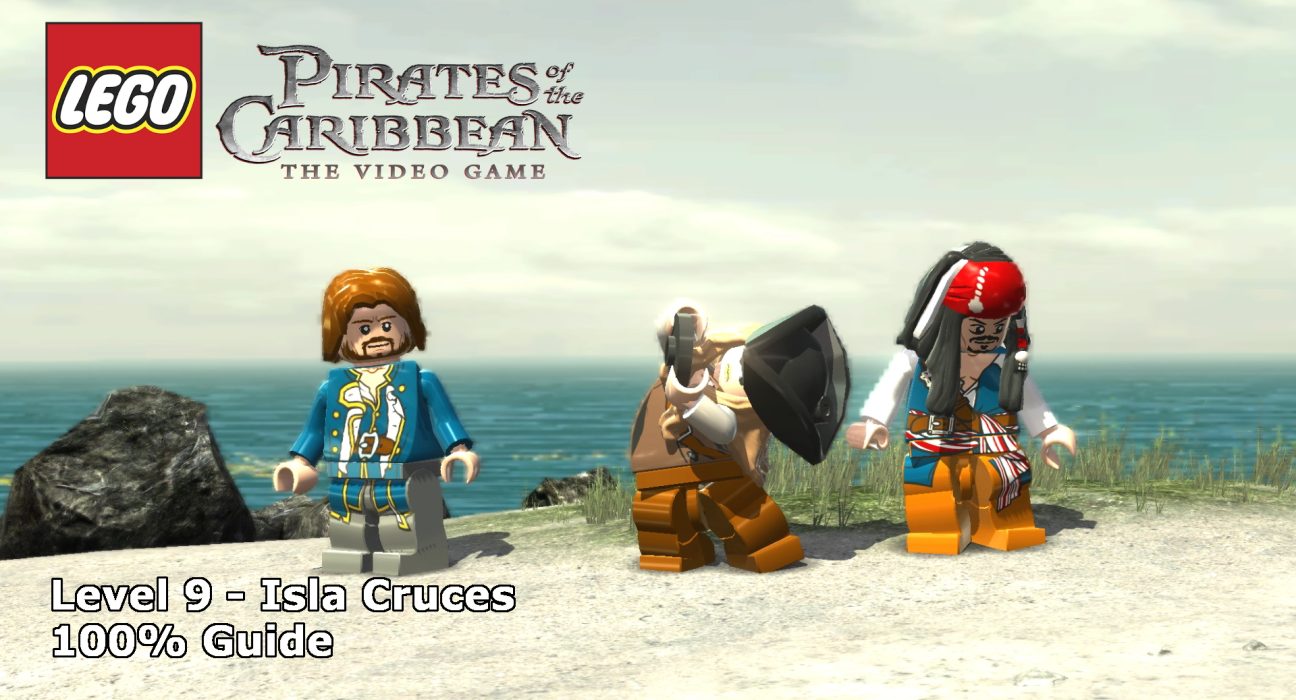
This guide will show you how to achieve 100% completion on LEGO Pirates of the Caribbean Level 9, Isla Cruces.

The video above will provides the full game play required, but there is additional information below to help further.


FULL GUIDE

LEGO Pirates of the Caribbean Guides

Level 1 – Port Royal
Level 2 – Tortuga
Level 3 – The Black Pearl Attacks
Level 4 – Smuggler’s Den
Level 5 – Isla De Muerta
Level 6 – Pelegosto
Level 7 – A Touch Of Destiny
Level 8 – The Dutchman’s Secret
Level 9 – Isla Cruces
Level 10 – The Kraken
Level 11 – Singapore
Level 12 – Davy Jones’ Locker
Level 13 – Norrington’s Choice
Level 14 – The Brethren Court
Level 15 – The Maelstrom
Level 16 – London Town
Level 17 – Queen Anne’s Revenge
Level 18 – White Cap Bay
Level 19 – A Spanish Legacy
Level 20 – The Fountain of Youth

This guide will show you how to achieve 100% completion on LEGO Pirates of the Caribbean.

Each level of in LEGO Pirates requires you to complete the following:

  • Find TEN Minikits
  • Find EIGHT Compass Points

Please support our YouTube channel by subscribing and liking this video. We aim to provide easy to follow guides and any feedback is welcome.


Level 9 – Isla Cruces

Minikits

Minikit #1 (00:27):
At the start of the level, head to the ship wreck and pull the strong handle off to reach the first minikit.

Minikit #2 (00:40):
From the previous minikit, head left into the water and use a character that can walk underwater to grab the minikit on the seabed.

Minikit #3 (01:41):
Following Compass Point #3 you’ll find a chest to dig up with the minikit inside.

Minikit #4 (02:57):
Once you’re off the beach, fight Jack until he heads off into the ruins. To the left, there is a graveyard with a silver-bricked gate on it, blow it up. Head inside and destroy all of the skeletons, rebuilding the bones into a barrel which you can ride over to a barrel point near the broken machinery. Doing this will open a gate with the minikit behind it. 

Minikit #5 (03:55):
As part of the story, you need to put together a machine which spins around a couple of doors to reveal a crate with tools in. Using that door spin two more times will release a red chest that Blackbeard can open for the minikit.

Minikit #6 (04:40):
In the tower, before you leave the exit at the top, use Blackbeard to destroy the skull in the top left corner. This releases a chain that allows you to climb to the roof. Up there, use the telescope for the minikit.

Minikit #7 (05:16):
Once you’re on the giant wheel, be on guard as not long after starting this section, a minikit will float by that you can jump up to get. I recommend using a female character so you can jump higher.

Minikit #8 (05:33):
On the final beach, head right and into a Davy Jones point which teleports you inside a ship wreck. In there, use a female character to double jump up to the top of the wreck for the minikit.

Minikit #9 (05:49):
After retrieving the cog from Compass Point #7, head back near where you entered the section of the level and place it where the arrow directs you. Use the cog to then raise a bridge of planks you can cross for the minikit.

Minikit #10 (06:44):
After building a baby crab on the beach as part of Compass Point #8, use a female character to swing along the poles at the treeline. At the end you’ll knock some brick down that can be rebuilt into another baby crab. Once the second crab reunites with the parent crab, the minikit will appear.

Level 9 – Isla Cruces

Compass Points

Compass Point #1 (00:49):
Chest found on the first beach.

Compass Point #2 (01:09):
Chest found on the first beach.

Compass Point #3 (01:28):
Chest found on the first beach.

Compass Point #4 (01:56):
Part of the story, the catapult bricks.

Compass Point #5 (02:31):
Banana, found on the first beach.

Compass Point #6 (02:47):
Part of the story – can’t be missed.

Compass Point #7 (05:44):
On the final beach, head right and into a Davy Jones point which teleports you inside a ship wreck. In there, use the compass to find a cog needed for minikits #9 and #10.

Compass Point #8 (06:20):
After retrieving Minikit #9 use the compass to locate the baby crab.

LEGO Pirates of the Caribbean – The Dutchman’s Secret 100% Guide

This guide will show you how to achieve 100% completion on LEGO Pirates of the Caribbean Level 8, The Dutchman’s Secret.

The video above will provides the full game play required, but there is additional information below to help further.


FULL GUIDE

LEGO Pirates of the Caribbean Guides

Level 1 – Port Royal
Level 2 – Tortuga
Level 3 – The Black Pearl Attacks
Level 4 – Smuggler’s Den
Level 5 – Isla De Muerta
Level 6 – Pelegosto
Level 7 – A Touch Of Destiny
Level 8 – The Dutchman’s Secret
Level 9 – Isla Cruces
Level 10 – The Kraken
Level 11 – Singapore
Level 12 – Davy Jones’ Locker
Level 13 – Norrington’s Choice
Level 14 – The Brethren Court
Level 15 – The Maelstrom
Level 16 – London Town
Level 17 – Queen Anne’s Revenge
Level 18 – White Cap Bay
Level 19 – A Spanish Legacy
Level 20 – The Fountain of Youth

This guide will show you how to achieve 100% completion on LEGO Pirates of the Caribbean.

Each level of in LEGO Pirates requires you to complete the following:

  • Find TEN Minikits
  • Find EIGHT Compass Points

Please support our YouTube channel by subscribing and liking this video. We aim to provide easy to follow guides and any feedback is welcome.


Level 8 – The Dutchman’s Secret

Minikits

Minikit #1 (00:27):
As soon as you start the level, head up the steps and jump off the edge. There’s a minikit out of view.

Minikit #2 (01:05):
At the very back of the ship is a chest that Blackbeard can open. Follow the story path, but don’t build the final crew member until you have all the minikits.

Minikit #3 (01:37):
Climb the back mast all of the way to the top and then shatter the glass in the crows nest. This will release a chain you can climb which will take you up to the very top of the mast and a zipline you can take to the minikit. 

Minikit #4 (02:03):
Once inside, jump down to the lower level and head to the far right and use one of Davy Jones’ crew to walk through the wall. On the other side, turn the wheel, this will enable you to reach the minikit. Head back through the wall, grab a torch and climb up a level. At the back you’ll see a load of purple tentacles and should be able to peek the location of the minikit. Jump over and grab it once the tentacles are taken care of.

Minikit #5 (02:48):
Back in the lower level, head right from the steps to find a strong handle over a floor panel. Pull to reveal steps to another level down. Once down there, use one character to activate a sword point and send the other through the wall to the other side and destroy everything you can. Once the barrier is destroyed, build the remaining pieces into a giant snail who will reveal a minikit.

Minikit #6 (04:01):
From the snail, head to the far left of this area and use Blackbeard to destroy the red skull for the minikit

Minikit #7 (04:11):
In Davy Jones’ music room, complete the section to get across the water. Turn the right wheel FOUR times and the left wheel THREE times. This will create the combination of platforms to reveal the minikit.

Minikit #8 (05:19):
Again in the music room, once you’re past the water, look to your left and you’ll see a silver-bricked cover over one of the pipes. Destroy it and jump in. In this new area, push the box along the track to reveal the minikit. Shoot the crate it’s in to retrieve it.

Minikit #9 (05:48):
On the far left of this room, shatter the glass fish tank for the minikit.

Minikit #10 (06:24):
From the previous minikit, head outside. Jump up high and grab the green pole, then jump again to reach the minikit.

Level 8 – The Dutchman’s Secret

Compass Points

Compass Point #1 (00:34):
Part of the story – can’t be missed.

Compass Point #2 (00:51):
Part of the story – can’t be missed.

Compass Point #3 (00:59):
Part of the story – can’t be missed.

Compass Point #4 (02:34):
Part of the story – can’t be missed.

Compass Point #5 (03:38):
Follow the instructions from Minikit #5 and then activate the compass for a trident.

Compass Point #6 (03:51):
From the previous point, activate the compass for the fish, it’s over to the far left.

Compass Point #7 (06:00):
In the music room, once you’re past the water, look to your left and you’ll see a silver-bricked cover over one of the pipes. Destroy it and jump in. Activate the compass in here for the swordfish piece.

Compass Point #8:
Not in Video – Given at level completion

LEGO Pirates of the Caribbean – A Touch Of Destiny 100% Guide

This guide will show you how to achieve 100% completion on LEGO Pirates of the Caribbean Level 7, A Touch Of Destiny.

The video above will provides the full game play required, but there is additional information below to help further.


FULL GUIDE

LEGO Pirates of the Caribbean Guides

Level 1 – Port Royal
Level 2 – Tortuga
Level 3 – The Black Pearl Attacks
Level 4 – Smuggler’s Den
Level 5 – Isla De Muerta
Level 6 – Pelegosto
Level 7 – A Touch Of Destiny
Level 8 – The Dutchman’s Secret
Level 9 – Isla Cruces
Level 10 – The Kraken
Level 11 – Singapore
Level 12 – Davy Jones’ Locker
Level 13 – Norrington’s Choice
Level 14 – The Brethren Court
Level 15 – The Maelstrom
Level 16 – London Town
Level 17 – Queen Anne’s Revenge
Level 18 – White Cap Bay
Level 19 – A Spanish Legacy
Level 20 – The Fountain of Youth

This guide will show you how to achieve 100% completion on LEGO Pirates of the Caribbean.

Each level of in LEGO Pirates requires you to complete the following:

  • Find TEN Minikits
  • Find EIGHT Compass Points

Please support our YouTube channel by subscribing and liking this video. We aim to provide easy to follow guides and any feedback is welcome.


Level 7 – A Touch Of Destiny

Minikits

Minikit #1 (01:04):
After you’ve reach the first point that the green tentacles grab the barge, jump on to the platform with the silver-bricked rocks. Destroy the rocks to reveal a double-jump point that a female character can use to grab the vine above for the minikit.

Minikit #2 (01:15):
As you’re bouncing over the lily pads, grab the vine hanging down above the last one. There’s a minikit up there. 

Minikit #3 (00:41, 01:24, 01:46, 02:08):
There are five frogs to destroy for this minikit scatter throughout the main part of the level.

  1. Right at the start, next to the spade.
  2. On the platform you use the lily pads to get to.
  3. After you open the vines to reveal a rope to the bridge, there is a frog to the right of those now open vines.
  4. Where the crocodile briefly appears and creates a path across the water, the hut on the other side.
  5. Just over 4, grapple hook up to the higher hut.

Minikit #4 (02:48):
Use Compass Point #5 to find the ball. Then return along the path to the previous hut and return it to the person with the ball icon above their head. 

Minikit #5 (03:22):
When fighting the croc, feed it food not bombs. Three pieces of food will reveal a minikit.

Minikit #6 (03:53):
After the croc is dead, head to the island in the middle and use Blackbeard to destroy the red skull and rebuild the pieces into a clock. Activate the clock to retrieve the minikit.

Minikit #7 (04:20):
From the middle island, jump over to the double jump point at the back of the area and grab the floating minikit in view.

Minikit #8 (05:17):
Compass Point #8 will take you to a crate of fish at the far end of the level section. Grab a fish and throw it at the larger fish in the water. The fish will then swim under the gate and release a minikit. Follow it.

Minikit #9 (05:58):
Inside the hut at the end of the level, destroy the silver-bricked planked wall for the minikit.

Minikit #10 (06:08):
Head into the other room and on the wall to the left is a safe that Blackbeard can open. The minikit is inside.

Level 7 – A Touch Of Destiny

Compass Points

Compass Point #1 (00:27):
Part of the story – Can’t be missed.

Compass Point #2 (00:46):
Part of the story – Can’t be missed.

Compass Point #3 (01:33):
At the part of the level where the cage must be raised by a crane, activate the compass for a golden mask. 

Compass Point #4 (01:55):
When you reach to hut with a guy with a ball icon over his head, activate the compass for another item.

Compass Point #5 (02:37):
Cross the water and grapple to the high up hut. Active the compass and you’ll find the ball.

Compass Point #6 (04:32):
On the platform after the crocodile, active the compass for a fish.

Compass Point #7 (04:43):
Near the end of the section, where you have to raise a final bridge, active the compass for a trident.

Compass Point #8 (04:56):
Before you enter the hut at the end of the level, activate the compass to find the crate of fish.

LEGO Pirates of the Caribbean – Pelegosto 100% Guide

This guide will show you how to achieve 100% completion on LEGO Pirates of the Caribbean Level 6, Pelegosto.

The video above will provides the full game play required, but there is additional information below to help further.


FULL GUIDE

LEGO Pirates of the Caribbean Guides

Level 1 – Port Royal
Level 2 – Tortuga
Level 3 – The Black Pearl Attacks
Level 4 – Smuggler’s Den
Level 5 – Isla De Muerta
Level 6 – Pelegosto
Level 7 – A Touch Of Destiny
Level 8 – The Dutchman’s Secret
Level 9 – Isla Cruces
Level 10 – The Kraken
Level 11 – Singapore
Level 12 – Davy Jones’ Locker
Level 13 – Norrington’s Choice
Level 14 – The Brethren Court
Level 15 – The Maelstrom
Level 16 – London Town
Level 17 – Queen Anne’s Revenge
Level 18 – White Cap Bay
Level 19 – A Spanish Legacy
Level 20 – The Fountain of Youth

This guide will show you how to achieve 100% completion on LEGO Pirates of the Caribbean.

Each level of in LEGO Pirates requires you to complete the following:

  • Find TEN Minikits
  • Find EIGHT Compass Points

Please support our YouTube channel by subscribing and liking this video. We aim to provide easy to follow guides and any feedback is welcome.


Level 6 – Pelegosto

Minikits

Minikit #1 (00:27):
Near the start of the level, once you break away the roots that allow you to climb the wall, head right and the top and follow the path to a silver-bricked pile of rocks to destroy. Once destroyed, head through the tunnel to the minikit.

Minikit #2 (01:38):
Back at the wall climbing section, follow the path left across the bridge and keep going left until you reach a silver-brick pile of rocks. Destroy them and head down the path. If you’ve activated Compass Point #2 then you’ll have access to the spinning puzzle. Complete that for the minikit.

Minikit #3 (03:26):
Once you reach to top where the huts are, use Compass Point #4 to find the telescope and then use it to get the minikit.

Minikit #4 (03:45):
After activating Compass Point #3 there will be a chicken cooking over the fire. Use Blackbeard to destroy it for the minikit. 

Minikit #5 (04:00):
Rolling back down the hill, about halfway down is a big red door in the side of the hill. Open it with Blackbeard and walk through the revealed path for the minikit.

Minikit #6 (05:11):
About halfway down the hill you roll down after the huts is a section with spikes. Near here is a large strong handle on the wall, pull it. This will reveal a bridge to a new area. Unlock Compass Point #5 to reveal a telescope that you can use for the minikit. Focus on the crab and it will get you the minikit.

Minikit #7 (05:26):
In the same area, there a climbable tree at the back. The minikit is at the top.

Minikit #8 (06:03):
Further down the hill, there is a grapple hook that can be used by Jack to reach another new area. Grapple over and use Compass Point #6 to find the minikit.

Minikit #9 (06:17):
In the same area, light one of the canons and shoot all of the targets for the minikit.

Minikit #10 (07:20):
In the final section, jump into the water with a character that can walk at the bottom. You’ll see a crab in a cage, destroy the crab and ride it to reveal the minikit.

Level 6 – Pelegosto

Compass Points

Compass Point #1 (00:27):
See Minikit #1 for details.

Compass Point #2 (00:56):
Back at the wall climbing section, follow the path left across the bridge and keep going left until you reach a silver-brick pile of rocks. Destroy them and head down the path.

Compass Point #3 (02:14):
After the last point, head back to the main route and up to the top where the huts are. Use the compass here for reveal a chicken over the fire.

Compass Point #4 (03:01):
Up by the huts again, activate the compass for the telescope. It’s around the back of the huts.

Compass Point #5 (04:20):
About halfway down the hill you roll down after the huts is a section with spikes. Near here is a large strong handle on the wall, pull it. This will reveal a bridge to a new area. Follow the path to reveal another telescope.

Compass Point #6 (05:35):
Further down the hill, there is a grapple hook that can be used by Jack to reach another new area. Grapple over and use the compass here to locate the next item.

Compass Point #7 (06:58):
In the final section by the river, activate the compass to find the bone nearby.

Compass Point #8 (07:06):
Part of the story – can’t be missed.

LEGO Pirates of the Caribbean – Isla De Muerta 100% Guide

This guide will show you how to achieve 100% completion on LEGO Pirates of the Caribbean Level 5, Isla De Muerta.

The video above will provides the full game play required, but there is additional information below to help further.


FULL GUIDE

LEGO Pirates of the Caribbean Guides

Level 1 – Port Royal
Level 2 – Tortuga
Level 3 – The Black Pearl Attacks
Level 4 – Smuggler’s Den
Level 5 – Isla De Muerta
Level 6 – Pelegosto
Level 7 – A Touch Of Destiny
Level 8 – The Dutchman’s Secret
Level 9 – Isla Cruces
Level 10 – The Kraken
Level 11 – Singapore
Level 12 – Davy Jones’ Locker
Level 13 – Norrington’s Choice
Level 14 – The Brethren Court
Level 15 – The Maelstrom
Level 16 – London Town
Level 17 – Queen Anne’s Revenge
Level 18 – White Cap Bay
Level 19 – A Spanish Legacy
Level 20 – The Fountain of Youth

This guide will show you how to achieve 100% completion on LEGO Pirates of the Caribbean.

Each level of in LEGO Pirates requires you to complete the following:

  • Find TEN Minikits
  • Find EIGHT Compass Points

Please support our YouTube channel by subscribing and liking this video. We aim to provide easy to follow guides and any feedback is welcome.


Level 5 – Isla De Muerta

Minikits

Minikit #1 (00:27):
At the start of the level, destroy the chain holding the row boat in place and jump in. Row to the right and you’ll see the minikit is hovering above the water. Jump up out of the boat to retrieve.

Minikit #2 (00:51):
At the first grapple hook point, there is a target in the distance off to the left. Shoot that and then switch to the other character to retrieve the minikit that appears with a double jump.

Minikit #3 (00:47, 01:03):
There are three parrots to destroy through the level.

  1. The first can be found off to the right once you cross the first bridge.
  2. The second, just before you canon ball the ball with the X on it.
  3. The third, in the section with the light beam.

Minikit #4 (03:25):
See Compass Point #5 for directions on how to get to where you need to go for this minikit, it involves two areas not accessible in story mode. Once you’ve retrieved the item from the point, simply return it to the character who asks for it to retrieve the minikit. 

Minikit #5 (04:25):
In the same area you found the Compass Point #5 item, there is a statue missing a helmet. The helmet can be found over to the right of the underwater area. Grab it and return it to the statue for the minikit.

Minikit #6 (04:41):
To the left of the previous minikit, there is a hole in the wall which you can swim through to get to another secret area. Swim up to the service to find a bay area with a ship and pier. Head around to the far right of the wooden path to find a chest that Blackbeard can open. This will allow you to build a cannon. Light the cannon and destroy the ducks that appear near the ship for the minikit.

Minikit #7 (05:31):
From the previous minikit, shoot the target on the back of the ship to release a rope ladder that you can use. Climb up to the deck and then up the mast to find a chain you can zipline across to the cliff nearby. The minikit is up there.

Minikit #8 (06:26):
In the same area, jump into the water to find a chest with a strong handle at the bottom, use Davy Jones to pull it open and grab the minikit.

Minikit #9 (06:47):
Head back to the previous area, where the statue from minikit #5 is and swim to the surface. There is a large puzzle up there that requires you to match two colours to the colour shown in the middle. The first few are simple, the same colour on both, but after a couple need to mix and match – ie. Green using Blue and Yellow.

Minikit #10 (08:30):
The final minikit is to the left of the previous one. After Compass Point #8 a double jump in available. Use it pull on the hanging rope and reveal the minikit.

Level 5 – Isla De Muerta

Compass Points

Compass Point #1 (00:42):
Activate the compass at the start of the level, there’s a trident in this area to collect. 

Compass Point #2 (01:21):
Part of the story – can’t be missed.

Compass Point #3 (01:35):
In the main battle area, over to the right, activate the point to find a fish.

Compass Point #4 (01:44):
In the main battle area, in the middle, activate the point and follow it to the back of the cave.

Compass Point #5 (02:02):
Once Barbossa is down to two hearts, a short cut scene will show some blue crystals. Shatter them with the mermaid and head through into a new area with a small island. Destroy the silver-bricked chest to reveal a soldier who wants an item. Return to the main area and head to the left to find another set of blue crystals to destroy. Once through there, use a the cursed (skeleton) Captain Jack to use the compass underwater and locate the telescope.

Compass Point #6 (04:01):
Activate this in the same area you found the telescope above. This will take you to a helmet needed for a minikit

Compass Point #7 (06:14):
Next to the statue in the area from the previous point, there is a hole in the walk. Walk through it and activate the compass to find a chest.

Compass Point #8 (08:20):
In the area with the colour puzzle, activate the compass to find the dog on the far left.

LEGO Pirates of the Caribbean – Smuggler’s Den 100% Guide

This guide will show you how to achieve 100% completion on LEGO Pirates of the Caribbean Level 4 Smuggler’s Den.

The video above will provides the full game play required, but there is additional information below to help further.


FULL GUIDE

LEGO Pirates of the Caribbean Guides

Level 1 – Port Royal
Level 2 – Tortuga
Level 3 – The Black Pearl Attacks
Level 4 – Smuggler’s Den
Level 5 – Isla De Muerta
Level 6 – Pelegosto
Level 7 – A Touch Of Destiny
Level 8 – The Dutchman’s Secret
Level 9 – Isla Cruces
Level 10 – The Kraken
Level 11 – Singapore
Level 12 – Davy Jones’ Locker
Level 13 – Norrington’s Choice
Level 14 – The Brethren Court
Level 15 – The Maelstrom
Level 16 – London Town
Level 17 – Queen Anne’s Revenge
Level 18 – White Cap Bay
Level 19 – A Spanish Legacy
Level 20 – The Fountain of Youth

This guide will show you how to achieve 100% completion on LEGO Pirates of the Caribbean.

Each level of in LEGO Pirates requires you to complete the following:

  • Find TEN Minikits
  • Find EIGHT Compass Points

Please support our YouTube channel by subscribing and liking this video. We aim to provide easy to follow guides and any feedback is welcome.


Level 4 – Smuggler’s Den

Minikits

Minikit #1 (00:27):
As soon as the level begins, there is a dig site right in front of you. This is not only a compass point, but also the first minikit.

Minikit #2 (01:38):
See Compass Point #6 for details on how to get to this minikit. Once you’ve located the point and built the sand castle, head through the crawl hatch to reach the minikit.

Minikit #3 (01:55):
Once in the cave, swap to Davy Jones (he has super strength and can walk underwater) and jump over the edge into the water. At the bottom, look around for a large Starfish with a crate to the right of it. Destroy the crate and rebuild into a strong handle that can be used to pull the starfish away from a chest containing the minikit.

Minikit #4 (03:02):
After you’ve used the telescope and returned to daylight, climb the tree next to the trapdoor that the light beam is heading into. The minikit is at the top of the tree.

Minikit #5 (03:18):
Next to where you build the catapult, there is a ship wreck that you can climb via a couple of wooden pillars sticking out of the water. Once up there, blow up the silver-bricked bell for the minikit.

Minikit #6 (02:22, 03:39):
Once the light beam has been directed into the underground area, head back down there and use the rotating mirror by the bridge to realign the beam. Unlike the story, however, move the beam to a different mirror which shoots it down into the water. Switch to a underwater character and jump in to where the light beam is going. Now push the mirror and rotate that that the light hits the tentacles and reveals the minikit.

Minikit #7 (04:19):
Over to the far left of the cave area is a wall that Davy Jones’ crew can walk through to retrieve the minikit.

Minikit #8 (04:56):
Slightly further left from the previous minikit is a silver-bricked wall. Destroy this to reveal an exit to another small island. From here, you can ride a turtle around a small course in the water. Complete the course for the minikit.

Minikit #9 (05:55):
Next to the turtle race, there are two canons. Jump on one and destroy all of the small ships that appear in the water for the minikit.

Minikit #10 (06:31):
Back in the cave, and once you raise the elevator as part of the story path, there is a strong handle revealed. Pull it away for the minikit.

Level 4 – Smuggler’s Den

Compass Points

Compass Point #1 (00:27):
See Minikit #1 for details.

Compass Point #2 (00:33):
Part of the story, can’t be missed.

Compass Point #3 (00:58):
Part of the story, can’t be missed.

Compass Point #4 (01:03):
Part of the story, can’t be missed.

Compass Point #5 (01:12):
Part of the story, but can be missed. This is the camp site. You can complete the level in story mode without registering it so make sure you activate the compass to grab this when nearby.

Compass Point #6 (01:29):
Activate this from the camp spot, it’ll take you to a dig point which contains a huge sand castle. This is needed for a minikit.

Compass Point #7 (02:57):
Part of the story, can’t be missed.

Compass Point #8 (03:12):
Part of the story, can’t be missed.

LEGO Pirates of the Caribbean Cheat Codes

potcfeat

Cheat codes can be entered from the Options section of the Main Menu. Enter one of the codes below to unlock the reward as described. Characters Code Character EW8T6T Ammand the Corsair DLRR45 Angelica (disguised) VGF32C Angry Cannibal D3DW0D Blackbeard ZM37GT Clanker 644THF Clubba 4DJLKR Davy Jones LD9454 Governor Weatherby Swann Y611WB Gunner 64BNHG Hungry … Read more

LEGO Pirates of the Caribbean – The Black Pearl Attacks 100% Guide

This guide will show you how to achieve 100% completion on LEGO Pirates of the Caribbean Level 3, The Black Pearl Attacks.

The video above will provides the full game play required, but there is additional information below to help further.


FULL GUIDE

LEGO Pirates of the Caribbean Guides

Level 1 – Port Royal
Level 2 – Tortuga
Level 3 – The Black Pearl Attacks
Level 4 – Smuggler’s Den
Level 5 – Isla De Muerta
Level 6 – Pelegosto
Level 7 – A Touch Of Destiny
Level 8 – The Dutchman’s Secret
Level 9 – Isla Cruces
Level 10 – The Kraken
Level 11 – Singapore
Level 12 – Davy Jones’ Locker
Level 13 – Norrington’s Choice
Level 14 – The Brethren Court
Level 15 – The Maelstrom
Level 16 – London Town
Level 17 – Queen Anne’s Revenge
Level 18 – White Cap Bay
Level 19 – A Spanish Legacy
Level 20 – The Fountain of Youth

This guide will show you how to achieve 100% completion on LEGO Pirates of the Caribbean.

Each level of in LEGO Pirates requires you to complete the following:

  • Find TEN Minikits
  • Find EIGHT Compass Points

Please support our YouTube channel by subscribing and liking this video. We aim to provide easy to follow guides and any feedback is welcome.


Level 3 – The Black Pearl Attacks

Minikits

Minikit #1 (00:27):
At the start of the level, the mast has a Blackbeard lock on it. Destroy that and climb the mast. You should spot the minikit on your climb.

Minikit #2 (00:49):
Head to the far left to find a cabinet with a silver-brick lock on it. Destroy it for the minikit.

Minikit #3 (01:11):
Head inside the ship when you can and to the far right. Here, you’ll find a Blackbeard lock blocking the stairs to the next level down, destroy it. The minikit is at the bottom of the stairs.

Minikit #4 (01:41):
Head left from the previous minikit, you can’t miss this one.

Minikit #5 (02:00):
There are five crates of blue crystals to destroy with the mermaid for this minikit.  

  • One under the stairs you on the lowest level.
  • Three on the next level up.
  • One on the other ship on the far right of the first level down.

Minikit #6 (03:09):
From the final blue crystals from the previous minikit, head to the far left and light the canon. This will allow you to control the canon. Destroy all of the buoys for the minikit.

Minikit #7 (04:23):
Follow Compass Point #5 to find this location. The point will lead you to a chest which can be destroyed for the minikit.

Minikit #8 (04:30):
From the previous minikit, head left and down the stairs. The minikit is at the bottom of the stairs.

Minikit #9 (04:51):
On the top deck, head up to the top of the mast on the left. There’s a Compass Point that will show you the path to the minikit.

Minikit #10 (05:02):
From the mast, drop down and grab the minikit hovering just below.

Level 3 – The Black Pearl Attacks

Compass Points

Compass Point #1 (00:39):
On the deck at the start of the level, this point leads to the far right. 

Compass Point #2 (01:03):
On the deck at the start of the level, this point is in the middle at the back.

Compass Point #3 (01:49):
Inside the first ship, first level, activate the point and head right.

Compass Point #4 (02:59):
Inside the second ship, activate the point and head left.

Compass Point #5 (03:56):
On the deck of the second ship, to the left, there is a glass floor panel you can shatter with the mermaid. This reveals an entrance to the ship, head in. Activate the point and follow to reveal a chest with a minikit in it.

Compass Point #6 (04:38):
On the deck of the second ship, head to the far left. There is grapple hook, that is the Compass Point.

Compass Point #7 (04:51):
See Minikit #9.

Compass Point #8 (05:15):
On the deck of the second ship, activate the point and follow the path to the barrel on the right.

LEGO Pirates of the Caribbean – Tortuga 100% Guide

This guide will show you how to achieve 100% completion on LEGO Pirates of the Caribbean Level 2, Tortuga.

The video above will provides the full game play required, but there is additional information below to help further.


FULL GUIDE

LEGO Pirates of the Caribbean Guides

Level 1 – Port Royal
Level 2 – Tortuga
Level 3 – The Black Pearl Attacks
Level 4 – Smuggler’s Den
Level 5 – Isla De Muerta
Level 6 – Pelegosto
Level 7 – A Touch Of Destiny
Level 8 – The Dutchman’s Secret
Level 9 – Isla Cruces
Level 10 – The Kraken
Level 11 – Singapore
Level 12 – Davy Jones’ Locker
Level 13 – Norrington’s Choice
Level 14 – The Brethren Court
Level 15 – The Maelstrom
Level 16 – London Town
Level 17 – Queen Anne’s Revenge
Level 18 – White Cap Bay
Level 19 – A Spanish Legacy
Level 20 – The Fountain of Youth

This guide will show you how to achieve 100% completion on LEGO Pirates of the Caribbean.

Each level of in LEGO Pirates requires you to complete the following:

  • Find TEN Minikits
  • Find EIGHT Compass Points

Please support our YouTube channel by subscribing and liking this video. We aim to provide easy to follow guides and any feedback is welcome.


Level 2 – Tortuga

Minikits

Minikit #1 (00:27):
As soon as you start the level, head around to the right to find a strong handle on a gate. Rip the gate open and head inside. Follow the pier pathway to a broken machine to repair. Once repaired, take the blocks recovered and place them on the waypoint. This will allow you to launch to small boat and reveal the minikit.

Minikit #2 (01:37):
Jump in the boat you released, and row out and to the left as far as you can to a new beach. On the beach, you’ll find a couple of dig spots for building the frame of a canon. The canon itself can be recovered from a large tentacle on the shoreline using the nearby torch. Put the canon together and then jump on and shoot the targets in front of you for the minikit. 

Minikit #3 (03:55):
To the left of the canon, there are two planks providing a way across the water to a rock. The pile of rocks there can be destroyed for the minikit.

Minikit #4 (04:13):
In the section of the level with the pig sty. There is a dig point with the minikit in it.

Minikit #5 (05:20):
From the main courtyard, where the horse is, there’s a lock that Blackbeard can break to reveal a new area. Go through into this area and climb the bell tower for the minikit.

Minikit #6 (05:33):
There are three crates of fireworks to light for this minikit:

  1. In the pig sty area
  2. Follow Compass Point #4
  3. To the left of the well is a strong handle on a gate. Open the gate for the fireworks

Minikit #7 (06:26):
Following the story path, head into the tunnel through the basement steps you have to build. In there, you’ll see a strong handle to pull on. This reveals a chain you can climb down to reach the minikit.

Minikit #8 (07:46):
In the tavern, reach the balcony and then blow up the gate to retrieve the minikit.

Minikit #9 (08:11):
In the main courtyard again, from the upper level, use the female character double jump to reach the roof on the left. Follow the roof around to the next building and jump over to that roof for the minikit.

Minikit #10 (08:28):
Once in the room with the parrot, use the mermaid to shatter the glass cabinet on the ground floor for the minikit.

Level 2 – Tortuga

Compass Points

Compass Point #1 (01:25):
In the new area found from Minikit #1, you’ll find this Compass Point.

Compass Point #2 (04:06):
Part of the story – The Apple in the courtyard that you give to the horse.

Compass Point #3 (04:30):
Part of the story – Found in the pig sty area.

Compass Point #4 (04:48):
In the main courtyard area, there is a lock that Blackbeard can break to reveal a new area. Enter this area and activate the Compass Point.

Compass Point #5 (06:55):
Part of the story – Found in the tunnel area.

Compass Point #6 (07:18):
Part of the story – Found in the tunnel area.

Compass Point #7 (07:28):
In the tavern, activate this point for a guitar.

Compass Point #8 (08:00):
Part of the story – The ruby used to unlock one of the characters.

LEGO Pirates of the Caribbean – Port Royal 100% Guide

This guide will show you how to achieve 100% completion on LEGO Pirates of the Caribbean Level 1, Port Royal.

The video above will provides the full game play required, but there is additional information below to help further.


FULL GUIDE

LEGO Pirates of the Caribbean Guides

Level 1 – Port Royal
Level 2 – Tortuga
Level 3 – The Black Pearl Attacks
Level 4 – Smuggler’s Den
Level 5 – Isla De Muerta
Level 6 – Pelegosto
Level 7 – A Touch Of Destiny
Level 8 – The Dutchman’s Secret
Level 9 – Isla Cruces
Level 10 – The Kraken
Level 11 – Singapore
Level 12 – Davy Jones’ Locker
Level 13 – Norrington’s Choice
Level 14 – The Brethren Court
Level 15 – The Maelstrom
Level 16 – London Town
Level 17 – Queen Anne’s Revenge
Level 18 – White Cap Bay
Level 19 – A Spanish Legacy
Level 20 – The Fountain of Youth

This guide will show you how to achieve 100% completion on LEGO Pirates of the Caribbean.

Each level of in LEGO Pirates requires you to complete the following:

  • Find TEN Minikits
  • Find EIGHT Compass Points

Please support our YouTube channel by subscribing and liking this video. We aim to provide easy to follow guides and any feedback is welcome.


Level 1 – Port Royal

Minikits

Minikit #1 (00:27):
Once Captain Jack heads up to the higher levels in the first area, climb up and you’ll see an orange strong handle. Pull the handle off to reveal an outside area with the minikit.

Minikit #2 (00:44):
Once in the prison hallway, head through the crawl hatch on the far left to push down the pivot needed to break the cell walls. Next, destroy the silver-bricked cell door as well. On the walls at the back of the cells, there are four targets to shoot down the hanging skeletons. Once all four skeletons have been shot down, rebuild them for the minikit.

Minikit #3 (01:51):
There are seven lamps hanging from the ceiling along the corridor. They all have handles on them that allow you to hang from them. Hang from all seven for minikit.

Minikit #4 (02:21):
After blowing up the cell walls, you’ll see there is a hole in the wall that you can go through. Head outside and work your way up the outside of the prison for the minikit.

Minikit #5 (03:34):
Once on to the next section of the level, there are three blue flags in the two courtyard areas.

  1. In the first part, climb up the wall and follow it around to the right to find the blue flag.
  2. In the next area, destroy the silver door to your right. Climb the stairs and then jump out on to the palm tree to climb up to the roof. The flag is up there.
  3. Before you exit this area, there is a final blue flag above the exit gate.

Minikit #6 (04:25):
From the final blue flag of the last minikit, climb through the nearby open window to find the minikit.

Minikit #7 (05:19):
See Compass Point #2 for details on how to create the path to this minikit. Once you’ve dug up the find and built it, jump from pillar to pillar to retrieve the minikit.

Minikit #8 (06:29):
See Compass Point #5 for details on how to retrieve the item needed for this minikit. Once you’ve retrieved the sausage, give it to the man below to retrieve the minikit.

Minikit #9 (04:31, 07:20):
There are five toy boats to build in order to retrieve this minikit. The first three can be found on the beach area where you’ll find the first couple of Compass Points outside. The final two can be found near the end of the level where you have to use a barrel to go under water.

Minikit #10 (07:54):
See Compass Point #8 for details on how to find the cage underwater. Once you find the underwater cage, destroy it to release the crab and reveal the minikit.

Level 1 – Port Royal

Compass Points

Compass Point #1 (03:23):
The first Compass Point can be found in the cell with the hole in the wall leading to the outside.

Compass Point #2 (05:07):
On the beach area, follow the track to reveal a dig point needed for a minikit

Compass Point #3 (05:34):
On the beach, this point is part of the main story.

Compass Point #4 (05:50):
Head to the far right of the beach to find this Compass Point.

Compass Point #5 (05:57):
In the final courtyard, there is a large silver-bricked stack of barrels, destroy it to reveal a new path. Head through to a new area and in the top-left, destroy the structures to reveal a Davy Jones point to climb through on the wall. The other end will bring you out on a balcony with a plate of sausages, grab one.

Compass Point #6 (06:46):
In the same area as the previous point, you’ll find the fish in the far right, up some steps.

Compass Point #7 (07:07):
In the same area again, the Compass Point should be right in front of you if you activate it in the middle of the area.

Compass Point #8 (07:41):
Before you head into the sea under a barrel, use a character who can swim/walk underwater and head to the far left to uncover a cage with a crab in it.