As mentioned in my last post, I’ve spend the last few months building a LEGO city from scratch, utilising the 2021 road plates, as well as modulars and other larger themed sets such as the Avengers Tower and Ghostbusters Firehouse. It’s been an extremely rewarding project for me as a life long LEGO fan and one that I wish I had begun years ago.
Now I’m fairly far into the project, I wanted to start posting about it more on the site, progress as and when, updates, and any interesting additions that may have been introduced along the way and that’s why I’m posting today.
Introducing the smaller building sets into a LEGO city can be a tough one, as I’m sure many AFOL’s know. Whilst they’re great for filling the gaps between modulars, and a fraction of the cost, the majority of smaller LEGO building sets have one very big problem in common – when it comes of city building that is – they tend not to be a complete building.
What I mean by this is the buildings tend to be facades with no back wall or completed roof, and this is obviously intentional, after all these lower-priced sets have a much younger target audience and (shockingly) are designed for maximum play-time, easy access for those young imaginations to run wild. What this does, however, mean is that there is work involved for us older LEGO fans that are looking to build our dream LEGO city, modifications to do.
 |
 |
I’d already done it with a few on the smaller sets, but in many cases I was able to back one building up against another to line up a back wall minimised effort where possible. Then came an idea, a challenge if you will, how can I integrate two of my favourite small LEGO sets into my city in such a way that they stand out and work well against the much large modulars….and so began the customised LEGO store.
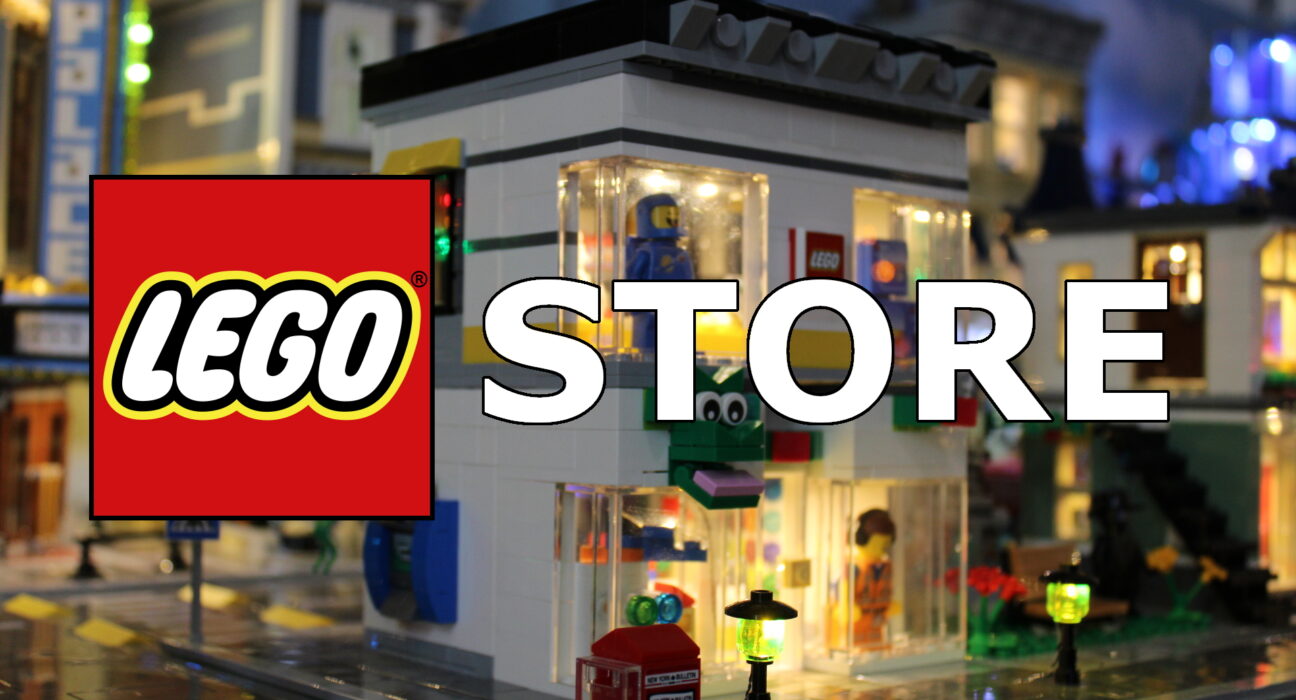
The two sets in question, both LEGO store exclusives were, 40105 and 40305, both I’m sure are familiar to many of you. I love both of the sets and I wanted to find a way to integrated them into the city in the best way that would retain as much of their original designs as possible. Rather than doing them as individual builds, however, I decided I wanted to integrate them into one larger building. Given the newer set had the more modern look, and included a cool ATM machine on the side, I decided that the best way to approach this was to use that as the basis for the design find a way to integrate aspects of the other set in.

At one point I did look at the possibility of starting from the ground up and building something complete unique, but that went horribly wrong, I’m not going to lie. In the end I settled on the most simplistic design integration I could think of that would lead to the larger store having an entrance on either side. This was both a design decision for ease, but also from a photographic point of view because it allowed better light into both sides. This also meant that I could integrate a good deal of the older set with ease.
Splitting the back and front apart on the older set, I was able to use the front half as the foundation for the back of my completed LEGO store with the dragon in tact. The back end of the set was stripped for parts with the till and LEGO set pieces eventually being added to the upper level. Using some spare parts I was able to replicate the design of the bottom half, with the large windows on either side. The only difference with the top half in terms of design was that I included the yellow band of bricks and the grey plates in the white walls so that it was consistent with the other set’s design. Similarly, the roof from the newer set was extended using spare parts and the design tidied up with a few tiles around the border.

Once the outer shell was built for the top layer, the LEGO Movie characters just seemed to work really well in the windows, along with some micro LEGO sets from the Yellow LEGO truck set from a few years back.
All in all, I’m really have with the results, especially since adding lighting as well. Whilst the cables still need a bit of a tidy up as this is very much a work in progress, the overall result of merging these two sets has actually turned out quite well considering I went for the easiest possible route.
Take a look at the video for a better look at the finished design, including the lighting.

Over the coming weeks and months I hope to be adding more posts on the progress of the city and anything I learn along the way, including photos and videos, so keep an out on the YouTube Channel and Twitter.
In the meantime, let me know what you think of the project via the comments either here or on YouTube.